• Skip to primary navigation
  • Skip to main content

Quilter's Thread

Quilting Inspiration and Education

  • Home
  • About Lisa
  • Gallery
  • Shop
    • Cart
    • QT Summits
    • Patterns
  • Events
    • Calendar
  • Contact

QT User Blog

The Log Cabin Quilt-As-You-Go Method

October 25, 2015 By Quilter's Thread

Lots of quilter’s prefer the quilt-as-you-go method because it is thought of as an easier system of quilting by simply attaching piece after piece of finished individual blocks to the next finished individual block creating the quilt as a whole piece over time. Remember the only thing that is different with this method is that the batting and backing is already put together with the blocks before attaching the blocks together.

6a00e54fb5759888340147e1eb5f7f970b-800wi

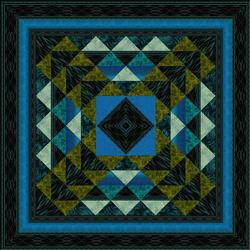
You can try the log cabin quilt for your pattern when first trying the quilt-as-you-go method. By choosing the log cabin quilt pattern for this method it allows the sashing to blend in more with the top appearing as a soft subtle frame for the blocks. The log cabin pattern is perfect for quilting as you go because it makes it easy for you to attach fabric piece by piece because of the long cut strips of fabric that you are using.

6a00e54fb5759888340148c7e551f4970c-800wi

Here are some guidelines and tips to help you as you complete this pattern while using the quilt-as-you-go method.

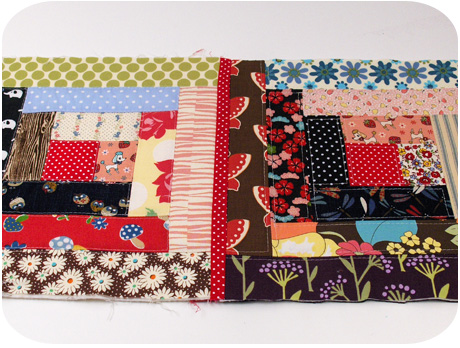
  1. When creating the log cabin pattern start in the middle center of the block. Once you have layered the backing and the backing together take your first square or rectangle piece of fabric and pin it in the middle of the block to use it as your focal point. Then start adding the strips of fabrics around the square in the middle working your way out using pins as you please to keep everything in place.
  2. Once you have finished the log cabin pattern for the block make sure you smooth everything out as you go so there aren’t any wrinkles once you are finished.
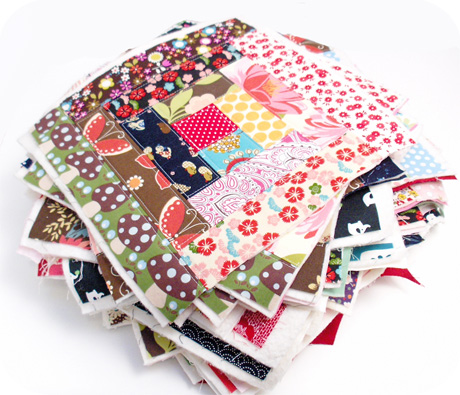
  3. After you have completed all the blocks and have trimmed them down to the same size you can start attaching them together.
  4. When your blocks of the log cabin are finished you can now start putting them together, sometimes referred to as “sashing”.
    1. The front piece of sashing will be 1″ wide x the height of the block. This piece of sashing is placed right sides together along the one side edge of that block.
    2. The backside piece of sashing will be 1.75″ wide x the height of the block. This backside piece is then folded in half with the wrong sides together along the length and then pressed.
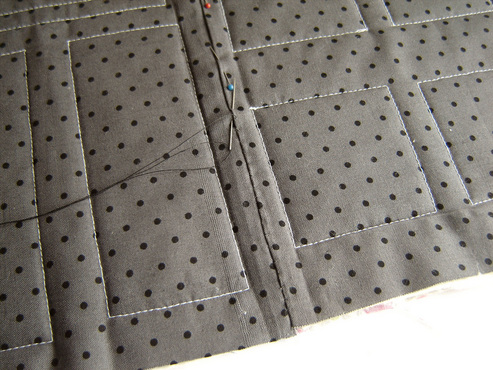
    3. Make sure that on the back of the block the folded back sashing is placed with the raw edges of the sashing matching the raw edges of the block. Always make sure the raw edges meet.
    4. Sew the sashing pieces in the block using a 1/4″ seam allowance. Then add the adjoining blocks together. The front sashing piece is opened and is now facing away from the first block with the raw edge matched to the side of now the second block that you have. Sew the second block to the front sashing using again a 1/4″ seam allowance. Now you have connected to blocks together!
    5. Turn to the back of the block. Notice the sashing piece is pulled over in the middle to cover the back seaming. Now you can fold the sashing back over the seam and stitch in place by hand or by using your machine.

Make sure to share with us your favorite tips and tricks that you like to use when quilting on Quilter’s Thread Mobile App.

Live Well. Quilt Well.

The Quilt-As-You-Go Method

October 23, 2015 By Quilter's Thread


The quilt-as-you-go method is when you piece together individual blocks adding the batting and the backing and then attaching the finished blocks together to make your quilt. The quilt-as-you-go method is a great way to save you some space when working on your project and as a quilter you can always do with more room to quilt. It is also a great way to finish big projects and smaller piece projects when you are using a smaller sewing machine. This is because you are sewing together individual blocks in the machine before sewing them together into one big block creating your finished quilt.

Give this method a try next time you start a quilt project and take note on how quickly you get your quilt done, most likely you will get it completed faster than your normal method of quilting. There are different preferences that people like to practice when using the quilt-as-you-go method. So simply pick the best method and or tricks that work best for you and start quilting!

562075


The most traditional method of quilting-as-you-go is to complete and finish each block before attaching it to other finished blocks to complete the quilt overtime. You can save even more time if you buy precut blocks.

You can also create mini quilts. By combining blocks in sections and then combine them all together at the end to make up the whole quilt. You can start joining your blocks in pairs however you like to make it easier and to create a logical system. Begin sandwiching each pieced block with batting and backing. It is recommended to pick a busy pattern for backing so that it is easy to hide unless you want it to stand out. You should take each sandwich as a complete little mini quilt. Then quilt in the ditch and the sashing giving you a base to measure your seams when connecting the backing.

Screen-Shot-2013-06-17-at-10.34.07-AM

When combining two blocks sew them together as you would normally, putting the right sides together and sewing them together using a quarter inch seam allowance or whatever you prefer. When ironing your blocks make sure you use 100% cotton batting because when you iron the seam you will want it to be as flat as possible and 100% cotton will give you the best results for a flat surface. When ironing the seam do it in the middle of both of the seams of the two blocks to prevent bulkiness.

To expand your knowledge and abilities as a quilter always try and explore new ways to complete a quilt. Share your favorite tips and tricks for the quilt-as-you-go method on the Quilter’s Thread Mobile App.

Live Well. Quilt Well.


Turkey Table Runner

October 9, 2015 By Quilter's Thread

TurkeyTrot-250x250 Screen Shot 2015-10-07 at 6.20.54 PM

e7432f9f991ff37ee07d30a46658b8b0

Looking for a fun yet quick project to complete just in time for Thanksgiving? Try making this turkey gobbler table runner that you can put on display on the dining room table for all your friends and family members to see while feasting. This table runner is easy to make. With all the different neutral fall fabric patterns for each section of the table runner, this piece will look great in any home. Notice how every piece of fabric has a detailed pattern giving it a little bit more detail to the design without having to do any extra work.

This table runner measures approximately 12″ x 38″ (30cm x 97cm) in size. So make sure you measure the table where you want to place it in order to ensure that it will fit properly. If it doesn’t fit properly you can always tweak the measurements yourself before starting the project.

This project pattern is completely free. For more information click here.

Key Tip: Always look around you for inspiration. With this time of the year local shops and stores will have decorations laid out all around for people to see. Take note of how other people decorate for the holidays to give you some extra ideas and inspiration for making a fall or Thanksgiving themed quilt.

Make sure to share and post your favorite fall themed quilts on our Quilter’s Thread Mobile App. The more you comment and like on our app the more points you earn to win monthly prizes. For more information go to Offers section in the app.

Live Well. Quilt Well.


Block Designs Perfect for A Winter’s Night

October 2, 2015 By Quilter's Thread

Although it just turned October it’s always a good idea to plan ahead on your seasonal themed quilts for other seasons such as winter.With the air getting more brisk, we quilters find ourselves having more time to stay inside and work on our quilt projects. Next thing you know the nights will get longer and the wind will get colder and suddenly it will be December. If you don’t have any projects that you are already currently working on, here are some great ideas of winter themed quilts to get started on before the first batch of snow hits the ground.

1.) Weave a Star

WeaveAStar2

This star block is a great winter themed pattern that you can incorporate into any quilt. Notice how the star requires just once strip of each pattern and then cut into two pieces and placed to look as if it was actually woven over one another. The dark blue fabric as the background makes the star appear as if it is shining bright on a cold winter’s night. The free motion stitching on the dark blue fabric in the background adds a nice touch making it look more distinct and unique.

To get the pattern click here.

2.) Winter’s Themed Snowflake Patch

7355.1422878341

This is another great block pattern to incorporate into a quilt for winter. The different sizes of dark blue triangles and light baby blue petals create this simple but yet intricate looking snowflake. The white background fabric used allows your eyes to focus on the snowflake as if it is falling out of the sky. A snowflake pattern such as this one is complex and will take a lot of time to complete but is all the more worth it once it is finished.

3.) Outback (Flying Geese) Quilt Block

F9E0556A-AEFF-9D0D-37B2CCDFED535F82

This quilt block does an excellent job of incorporating shades of forest green and shades of dark blue giving the feeling of being in a forest on a winter’s night. The use of triangles pointing in different directions help give it its interesting motion as of trees blowing in the wind. However, this is an easy quick pattern to sew because of all the half-square triangle pieces as well as the flying geese technique to create this pattern.

To get this pattern click here.

Make sure to share with us your favorite winter themed pattern on our Quilter’s Thread Mobile App. The more active you are the more points you can earn to win monthly prizes such as free patterns or a gift card to use at the shops posted on our app. For more information click on the link here.

Live Well. Quilt Well.


« Previous Page
Next Page »

Copyright Quilter's Thread© 2025