• Skip to primary navigation
  • Skip to main content
  • Skip to primary sidebar

Quilter's Thread

Quilting Inspiration and Education

  • Home
  • About Lisa
  • Gallery
  • Shop
    • Cart
    • QT Summits
    • Patterns
  • Events
    • Calendar
  • Contact

New Monthly Pattern Prize – The Royal Braid

May 1, 2016 By Quilter's Thread

Quilter’s Thread Mobile App has a new pattern prize for this month that you’ll want to have. This quilt pattern is called the Royal Braid quilt hence the pattern resembles a braid shape. The pattern design has four versions so start adding points up on our Quilter’s Thread Mobile App in order to win this pattern at the end of the month.

Royal Braid- original version Royal Braid- multi color

  1. Original Royal Braid                2. Multi-Color Royal Braid

Royal Braid for Crown Royal Bags Spring Version- Royal Braid

3. Crown Royal Version                   4. Spring Themed Royal Braid

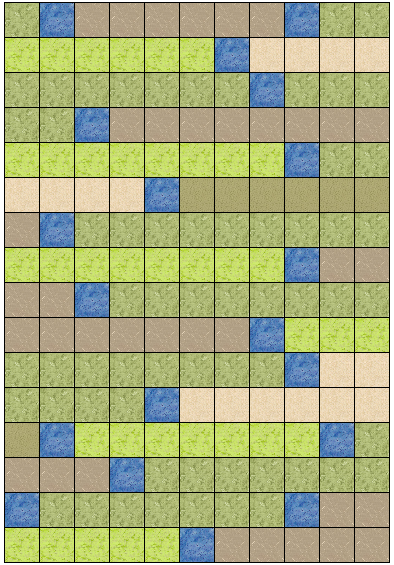
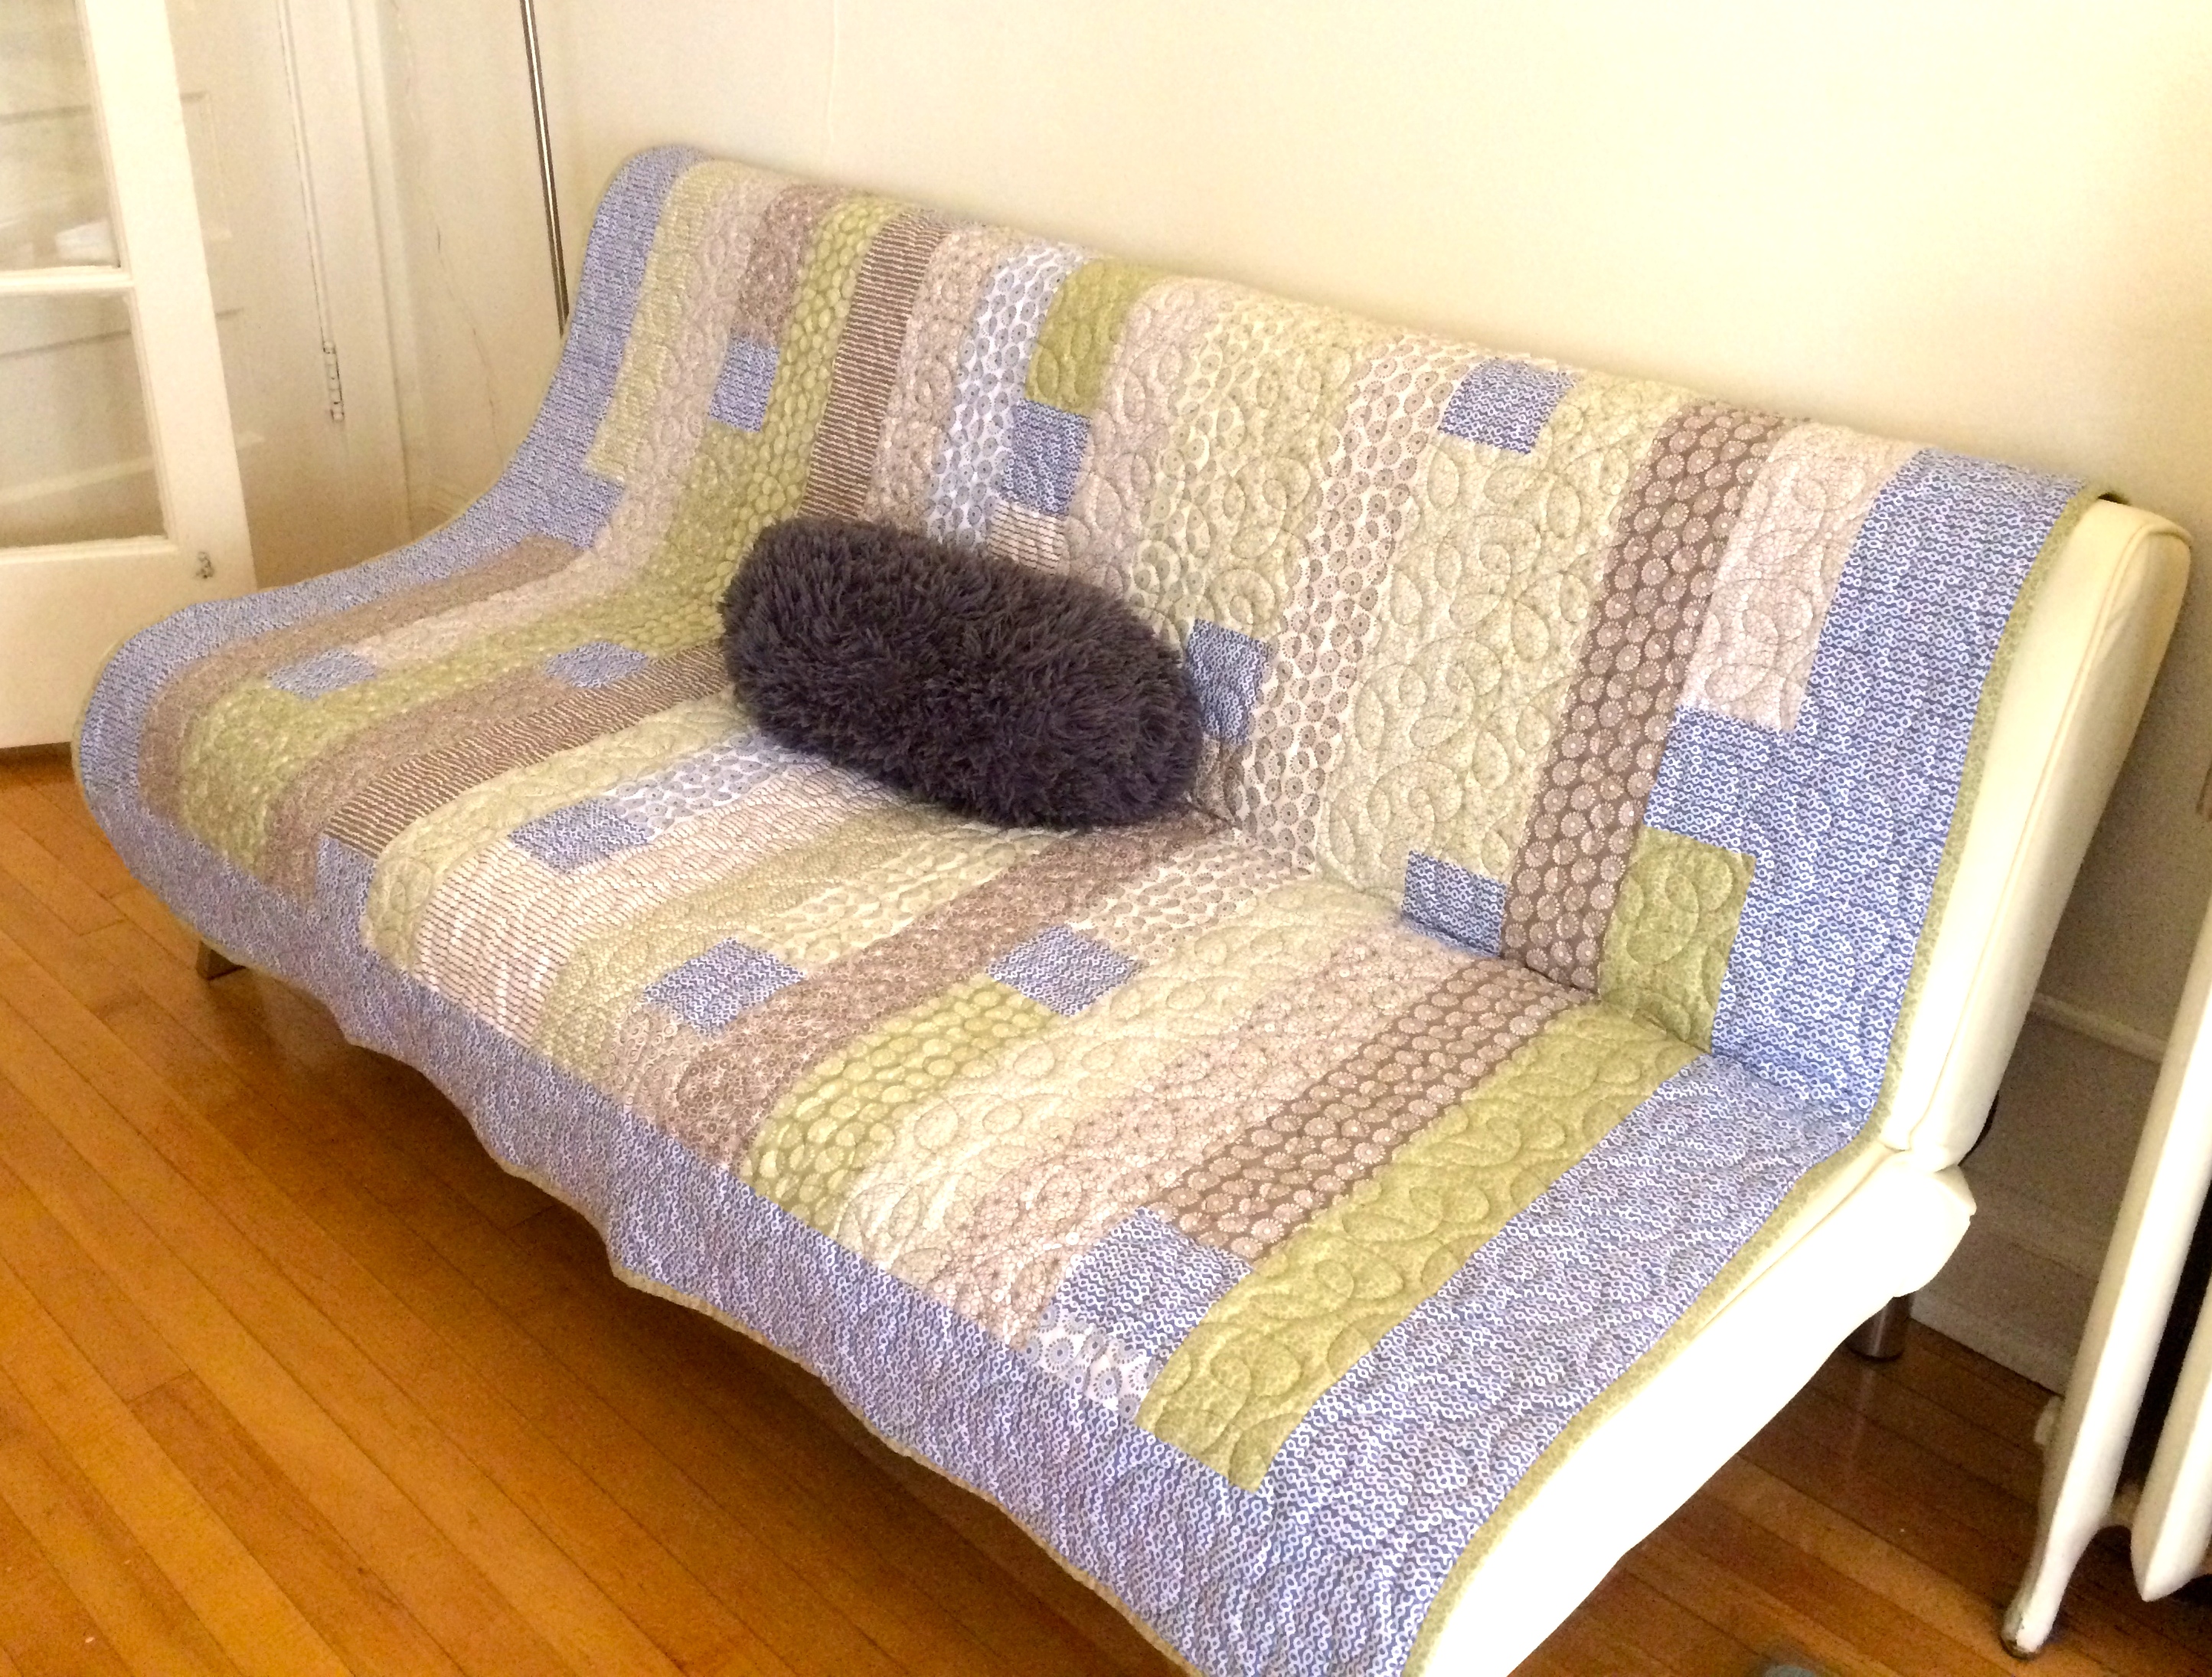
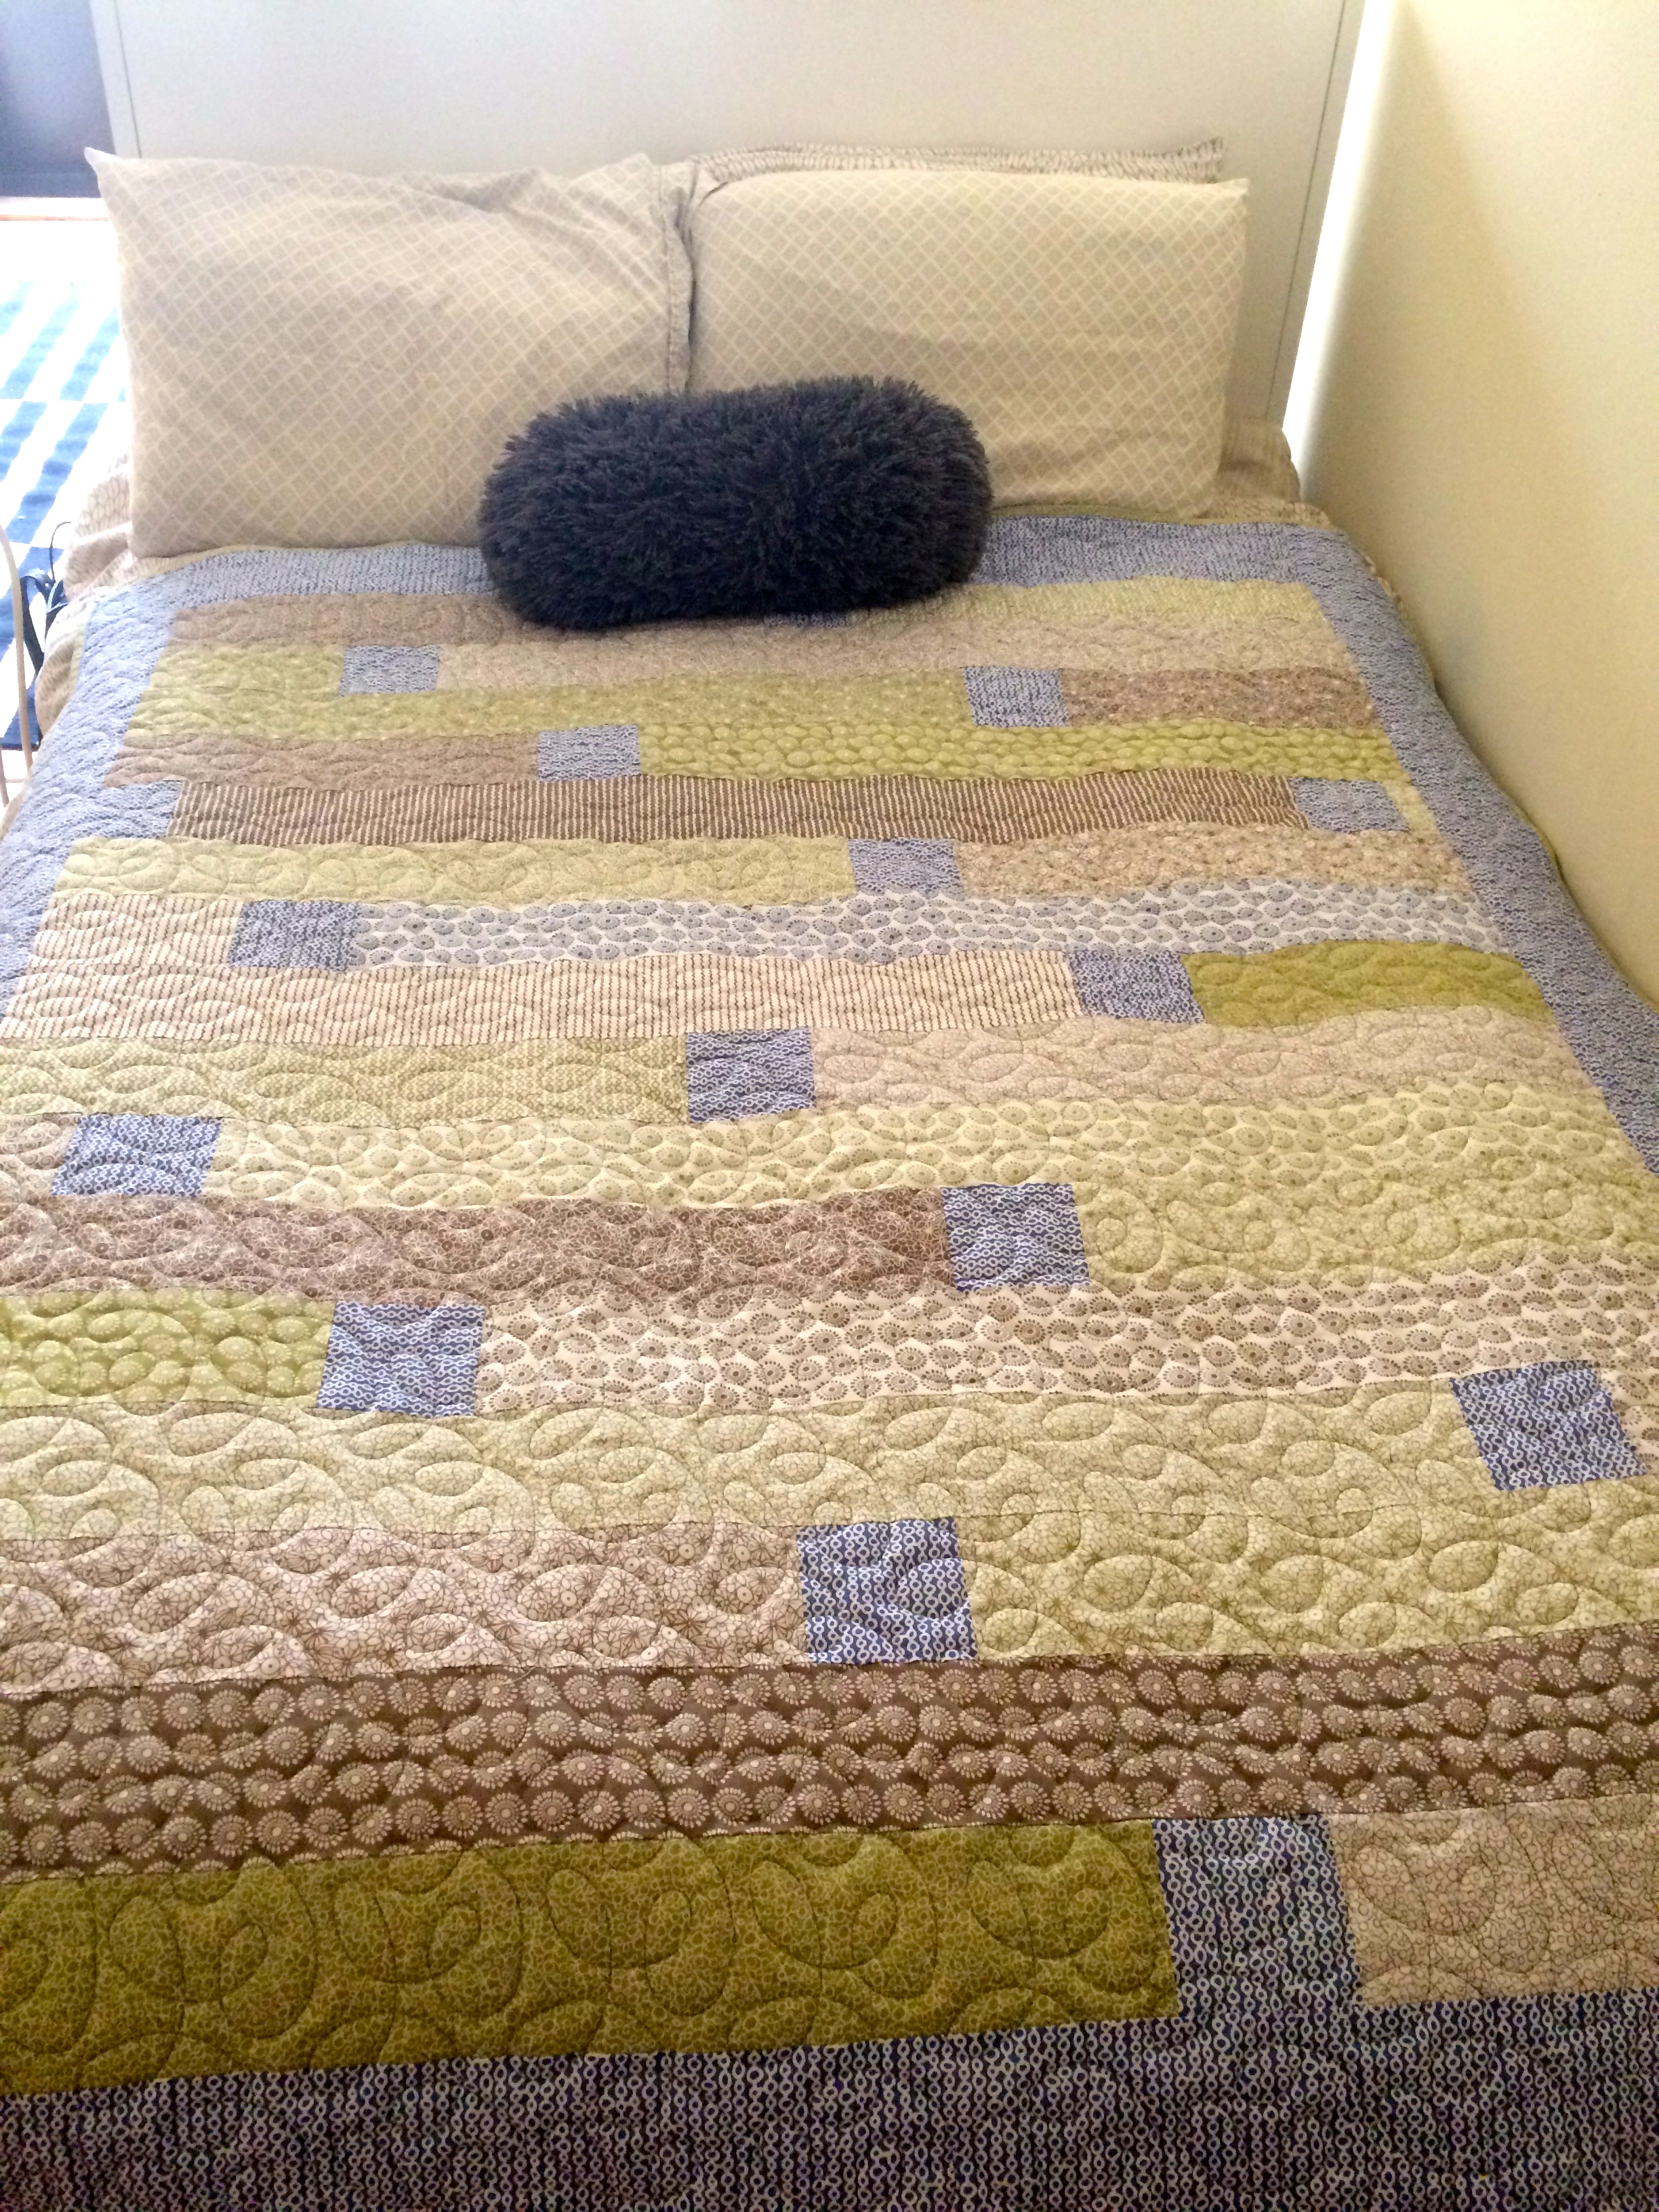
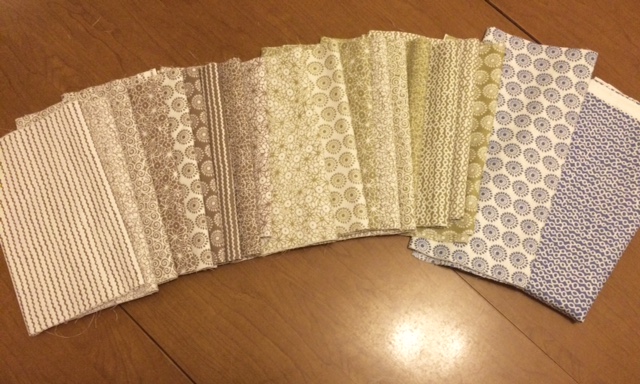
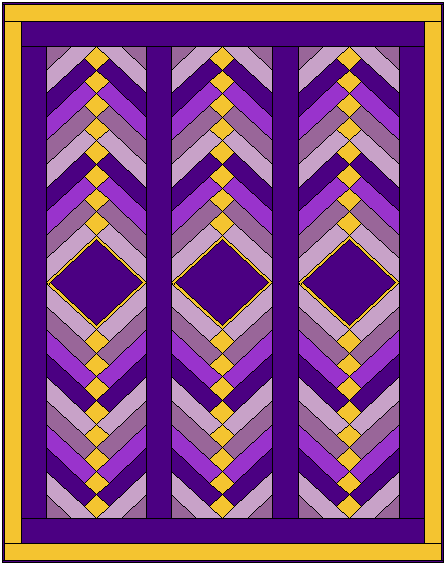
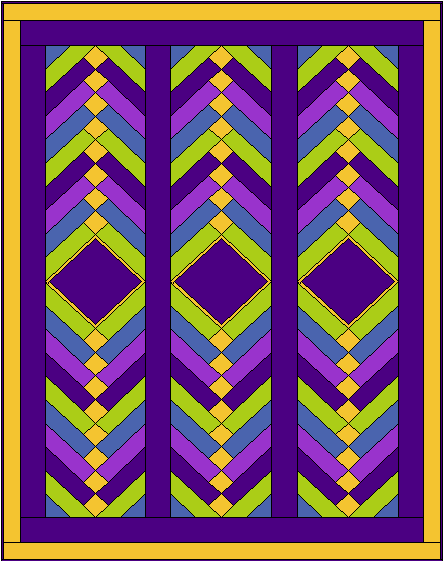
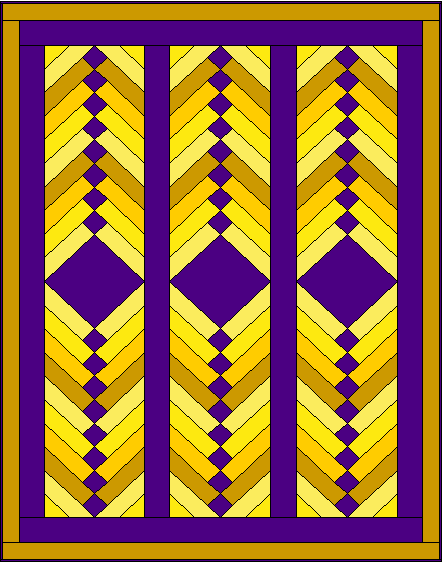
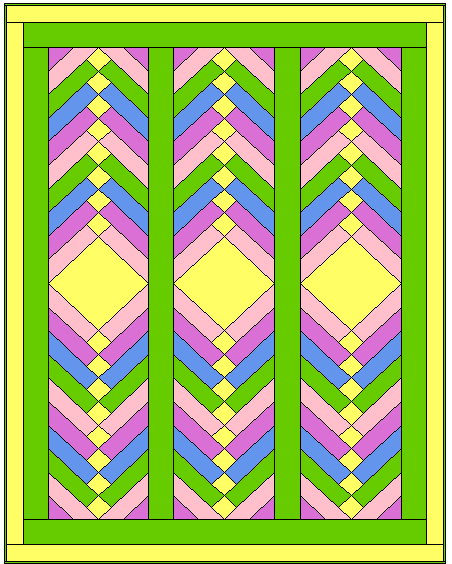
The first quilt above is the original version of the Royal Braid quilt which has a variety of different shades of purple in it with little golden squares in between the braids. The second version of the Royal Braid quilt has multiple colors in it such as blue and green  giving it a different look compared to the original version.

The third quilt version is the Crown Royal, which has more yellow than purple in it. You can cut around three logos from Crown Royal Bags if you want and place them where the three purple squares are in the middle of the quilt to give it a nice unique touch. The fourth version of the Royal Braid is a great pattern for spring with it’s bright colors and yellow squares makes the interlocking chain braid moving from one part of the quilt to the other come alive. You can choose to add a border like in the drawings above or you can leave it without one. Having a border let’s the pattern come to an end without running off the quilt making it feel as if it is unfinished.

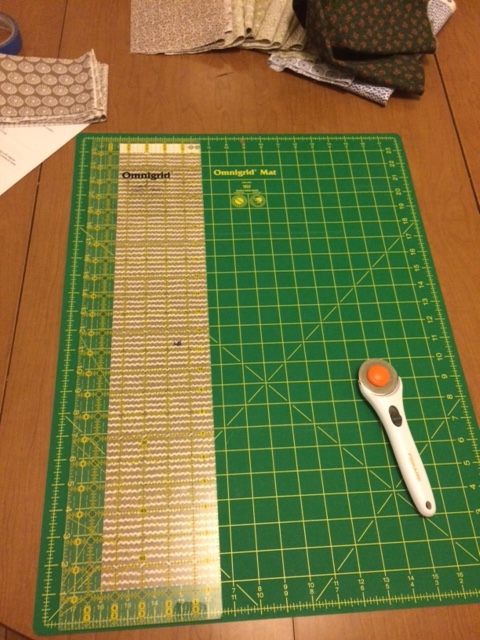
Share with us any versions of the Royal Braid quilt pattern that you make on Quilter’s Thread Mobile App. Remember to stay active on Quilter’s Thread Mobile App in order to earn points to win this free pattern at the end of the month. Comments, uploading photos, and responding to surveys generate 1 point each. Liking 3 things on the app generates 1 point. Earn 10 points gets you a free pattern and 40 points gets you a free pattern and a Quilter’s Thread cloth shopping bag. Earn 75 points gets you a free pattern, shopping bag, and a $20 gift card.


Live Well. Quilt Well.


Beginner’s Simple Strip Quilt – Sewing It All Together

April 22, 2016 By Quilter's Thread

After I had finished cutting all of my fabric in the previous blog post, it was then time for me to start quilting all of the pieces together! This is the part that took the most time and focus. I started quilting around 11 a.m. and finished around 4 p.m.that same day.

For this part of the quilting process I used white thread so that it wouldn’t stand out from my fabric in any way. The sewing machine I used was a Janome Gem Gold sewing machine. This sewing machine is a nice lightweight machine that is designed especially for transporting and is a good medium size machine to work with. One part of the sewing machine I want to point out is the foot. This helped me guide my fabric into the sewing machine. I used a quarter inch seam.


Ellen's 1600 Quilt

When making this quilt I sewed the pieces together using a technique called the “1600 Quilt”. Quilter’s Thread Mobile App has the pattern in the gallery library called “JoyAnn’s First Strip Quilt” and explains in detail this technique.  It is also important to note that JoyAnn’s First Strip Quilt was done with 2.5″ strips instead of 4.5″ strips that I used in this quilt. You can read about the how to make the quilt here.

What I did was I simply sewed a square piece to the end of each of my 4.5″ strips. Then I sewed the next long strip onto the block. When I had one very long pieced strip, I then folded it in half and sewed it down the long side. I did that a total of four times.  Then I added the border with the leftover blue fabric. When you first start your strip make sure you double stitch the ends before continuing forward. You want to align the strips next to each other and sew them together.

After you have completed sewing the strips together now make sure you press the seams of the quilt. First press the seams of back of the quilt and then press the front smoothing out any dents or wrinkles. Once I was done I could see just how much this helped my quilt look and feel more smooth than before. Now you are done!! Here are the end results!


IMG_2695IMG_2699

This quilt is  perfect for my full size bed and my futon as well adding some color to the room! The quilt size is about 69 1/5 and 58 1/2. with the border. If you have any questions regarding on how I made this simple strip quilt or about the method that I used, feel free to ask by going onto the Quilter’s Thread Mobile App and commenting in the blog section!

Live Well. Quilt Well.

Beginner’s Simple Strip Quilt – Cutting the Fabric

April 15, 2016 By Quilter's Thread

If you are a beginner quilter you are likely therefore a beginner to the fabric cutting process as well. This step of the quilting process was the most nerve wrecking part for me simply because I didn’t want to mess up my measurements and waste money on buying more fabric. Another reason this part was intimidating was because I would have to use the rotary cutter. A rotary cutter is like a pizza slicer except it has a much sharper blade. You will use a rotary cutter to cut your fabric instead of using regular scissors. I took my time when cutting the fabric because I didn’t want to tear the fabric, messing the edges up. So here is a break down of how I cut my fabric for my quilt.
First here is what you will need:
  • Rotary cutter, preferably a brand new one because it will be super sharp. Many quilters fail to keep good blades in their cutters, which makes it difficult to get a clean cut. A good brand is Fiskars.
  • A sturdy cutting mat. We recommend one that is big preferably 18″ x 24″. The Olfa Gridded Cutting Mat is a good option and is what I used to cut my fabric on.
  • A long ruler to measure the fabric. A good rule type is the Omnigrid.
 The first step is to practice. I practiced cutting with leftover scrap fabric before I started cutting into the fabric purchased for my quilt. With the scrap fabric placed on the cutting mat I started making cuts into the fabric sliding the rotary cutter away from me while holding the fabric in place with the ruler with one hand and the other hand moving the rotary cutter. I wanted to make sure that I felt comfortable holding the rotary cutter while applying pressure before moving to my quilt fabric. It’s important to mention that quilting fabric has a thread count which contains so many threads per inch. This is why it is important to have proper cutting tools and skills so that your pieces are more concise and accurate.
Once I felt comfortable I moved on to my fabric. Now I had to focus on squaring up and measuring the fabric before cutting it. For measurements I needed to cut (1) 4 1/2″ strip from each tan and green fabric. The fabric is folded, but the full width is between 40 and 44″. So my strips will be approximately 44″ x 4 1/2″.
FullSizeRender
First square up your fabric. Fold the fabric along its length with the selvages (the rough edges) together and make sure that the fold is straight. Place the ruler on top of the fabric as shown in the image below. Use the ruler to measure 4 1/2 and cut each side. Then do this for all the green and tan fabric. Make sure to recheck your measurements, the more exact they are the better.
IMG_2335
 Now with the two blue fabrics that I chose I will cut (2) 4 1/2″ strips. From those strips, I needed to square up one of the 4 1/2″ ends on each strip then cut (18) 4 1/2″ squares. You will then have 18 blue squares that will be placed in between the green and tan strips as shown in the image below. Make sure to save the leftover blue fabric so you can use it as a border for the quilt later on. Also save your fabric from the tan and green so that you can use it for future quilts.
 Ellen's 1600 Quilt
I hope you enjoyed this blog piece on how to cut fabric for a simple strip quilt pattern. Stay tuned for the next blog piece on how I stitched the fabric together to make my quilt as well as how to press your seams by ironing them.
Live Well. Quilt Well.

Beginner’s Simple Strip Quilt – Choosing the Fabric

April 10, 2016 By Quilter's Thread

In this blog piece I will walk you through the journey of creating my very first quilt and the decisions and thought process that went into making it.  This first post will discuss the process of  quilt shopping and picking out fabrics for a simple strip quilt design that is easy for beginner’s (like me) to make.
I first had to consider what colors would work with what my apartment theme is currently. My apartment is modern with all white furniture from Ikea and light hardwood floors with white walls. So I knew I wanted my quilt to have bright colors in it because it would stick out and help add character to my living room.  I spent some time before going to the quilt shop brain storming ideas of what my quilt would look like.
When I got to the quilt shop I started looking at all the fabrics. At one point I just decided on one color I knew I wanted in my quilt that I liked. That color was a light lime green. I also knew that I wanted the fabric to have some kind of simplistic modern pattern in it such as dots or swirls. Once I found the green fabric with white swirls in it, I noticed that there were other fabrics that were the same but just different colors sitting next to it on the shelf.
The fabrics shown in the image below are P&B Textiles “Urban Scandinavian” by Kristen Cogan. I  purchased this fabric at Patched Works, a local quilting shop in Brookfield, WI. This quilting shop has a wide variety of fabrics to choose from which made it incredibly fun but also incredibly daunting to find the right fabric for this quilt.
In the images below you can see that I picked fabrics that are from the same family. The three colors I chose to work with were light green, blue and tan brown. I picked nine tan brown fabrics and nine green fabrics and then two light blue fabrics. All of the fabrics have white in them which I wanted so that it would still have white space for the eyes to focus on without getting distracted by all of the different patterns in the fabric that I chose. The color wheels in the image below show the fabrics that I chose that are grouped together by the manufacture showing the fabric collection. The green, blue and tan brown colors that I chose are an analogous color scheme, a perfect choice for my first quilt design.  For more on color schemes, see Color Basics – Part 2 in the Group Project Library.
Tips:
  • If you have a hard time picking out fabric for the quilt ask a professional working at the quilt shop or grab a color wheel to help you find colors that will complement each other.
  • Find a multi-colored fabric that you like and choose solids or tone-on-tone fabrics that match. Select fabrics from the same collection and match them by value to the pattern you’re making.
FullSizeRender
 smp1511_urbanScandinavian
 Now once I picked out the fabrics that I wanted I went to go checkout. The people at the quilt shop took my fabric to a long table and started cutting it for me.
I used 4.5″ strips, and some extra for squaring up the fabric. I learned that the width is determined by the manufacturer and is usually between 40 and 44 inches.  The width of the fabric is the distance from selvage-to-selvage which are the edges woven in the manufacturing process to keep them from fraying. The width of the fabric used in the image above was 43″. So the strip of this  quilt is approximately 44″ x 4 1/2″.
Tip:  If you are a beginner it is smart to get a little extra fabric than needed just in case you make a mistake when cutting.
Ellen's 1600 Quilt

Drawing of the finished quilt


 The next step after buying my fabric was to start cutting. Stay tuned for the next blog piece on how to properly cut fabric for this simple strip quilt. In the second blog piece I will also talk about how to accurately square up your fabric and how to be safe when using a rotary cutter as well.
Live Well. Quilt Well.
« Previous Page
Next Page »

Primary Sidebar

Welcome!

Lisa Berentsen
I’m Lisa Berentsen, 
a teacher and artist who uses abstract geometric quilts to create images depicting beauty, balance, joy and hope. Share the passion and dialog. Create!

Live well, Quilt Well.

Newsletter

We'd love to keep you up to date on the latest with Quilter's Thread and share a free pattern with you. Never miss a post or a pattern, and get the best quilting content in the world delivered to your inbox each month.

Search Quilter’s Thread

Recent Posts

  • Free Falling Upward: Gravity and the Aspen Trees
  • What was wrong with Supernova?
  • “Wandering With Abandon” will be wandering for 2 years
  • Quick Quilt for Project Quilting 10.3 Challenge.
  • New Quilt: Promising First Date

Copyright Quilter's Thread© 2025