• Skip to primary navigation
  • Skip to main content
  • Skip to primary sidebar

Quilter's Thread

Quilting Inspiration and Education

  • Home
  • About Lisa
  • Gallery
  • Shop
    • Cart
    • QT Summits
    • Patterns
  • Events
    • Calendar
  • Contact

All About Minky Fabric

November 12, 2015 By Quilter's Thread

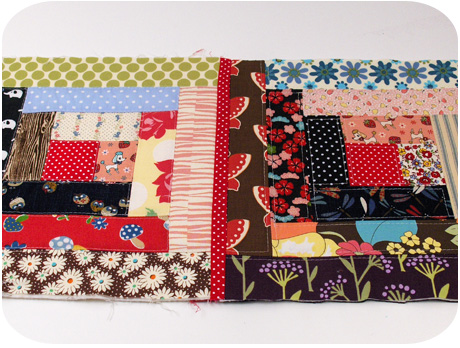
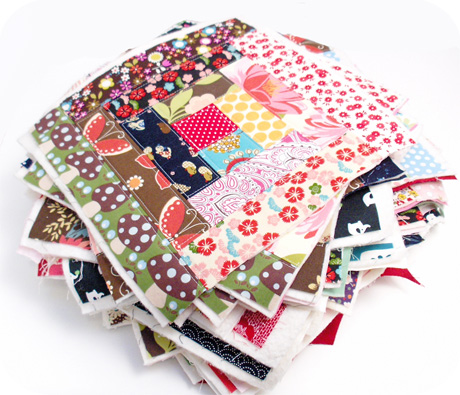
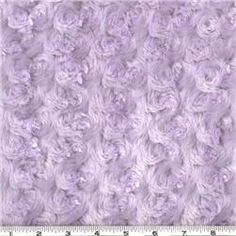
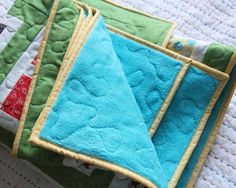
Minky fabric also called “Cuddle Cloth” is a kind of fabric that is becoming more and more popular to make bed quilts with because of its super soft and fluffy touch. Minky fabric is also great to use when making baby quilts or even quilts for the living room. However, Minky fabric needs to be handled a little bit different than other fabrics because of its fabric’s super softness. It’s important to take your time cutting and sewing this kind of fabric because it is fragile, and because it can stretch easily due to the super softness of fabric. Here are some tips to help you when making a quilt out of Minky fabric.

77de422b8355a7cc1ea6caaf235b3c1401b96c91367da2398f29f85b6113a248

Tip # 1

Careful when pinning Minky because it is fragile and pins can damage the fabric. Use only as many pins as you need to hold pieces together. Always cut your pattern pieces and then hold them in place and then use pins while you sew each section together. You can also use freezer paper to help you piece your Minky fabric together while helping provide a more precise and accurate cut.

Tip #2

Invest in a walking foot which will help feed the fabric through evenly. Don’t try and pull your fabric through the feed just simply guide it through.

Tip #3

Once you have finished making you quilt make sure to wash it in cold water with a gentle cycle so that your Minky fabric doesn’t get ruined in the process of cleaning it.

Make sure to share with us your favorite quilts made with Minky fabric as well as any tips or tricks you have found to be helpful on our Quilter’s Thread Mobile App. We want to hear from you. Comments, uploading photos and responding to surveys generate 1 point each. “Liking” 3 things generates 1 point. 10 points gets a free pattern. 40 points gets a free pattern and a cloth shopping bag. 75 points gets a free pattern, a shopping bag and $20 gift card.

Live Well. Quilt Well.


Tips for Easy to Make Rag Quilts

November 6, 2015 By Quilter's Thread

Rag quilts are always a great way to make a quilt out of any leftover scraps of fabrics you have laying around your work station at home. Whats also great about rag quilts is that you can get creative with what you have for fabric. Such as you can even use old blankets or clothing pieces such as jeans or flannel that your family is no longer using. Turn that old fabric into the perfect rag quilt for trips to the park with the family or even use it as an extra blanket to keep around the living room. Here are some tips and tricks to help guide you to making the perfect rag quilt.

photo 1 Half-Square-Triangle-Rag-Quilt-10-20112f6e7c27e70d1d5d64d85320c3c360d6

Tip #1

Any kind of fabric can be used to make a rag quilt, your the options are endless and anything will work well. If you are really concerned about the fabric check to see if it is 100% cotton so that it won’t fray. Another kind of fabric that is good to use is polyester, this too will limit your fabric from fraying overtime. Or you can use Minky fabric which has become a very popular kind of fabric for making baby rag quilts because of its softness. However, keep in mind Minky fabric is more slippery than other fabrics so be careful when cutting it. Take care of it when sewing and when lining up the fabric.

Tip #2

When sewing your blocks together to make the rag quilt make sure that you are alternating the sides from which you begin sewing your blocks together so that your quilt won’t result in a wonky and uneven shape but instead have even smooth sides. You can also use a walking foot to help you while connecting your pieces together to help feed the top and the bottom together evenly.

Tip #3

When making a rag quilt you will be making lots of cuts and snips to your fabric. Invest in excellent scissors in order to properly make cuts and snips to your fabric. There is a wide variety of scissors you can choose from. So simply pick one that has a comfortable grip that you like so that your hand won’t get tired and sore from making so many cuts. Such scissors like Amplify scissors and Fiskars that are specifically made for rag quilts will help get you the results you want.

Tip #4

When you have completed your rag quilt make sure to cut all of the seams. Then throw the rag quilt into the washer running it on a normal cycle. Give your rag quilt a good shake after taking it out of the washer to get rid of any loose threads that may be hanging. Then either let it air dry or throw it in the dryer on normal heat. It is recommended that you use the dryer in order to fluff out the edges of your quilt making it look more like a rag quilt with extra fluffier edges giving it a softer touch.

Stay tuned for another blog next week for more about Minky fabric and how to use it properly in rag quilts. Make sure to share with us your rag quilts on Quilter’s Thread Mobile App. The more active you are on the app the more points you can earn to win monthly prizes such as a free pattern.

Live Well. Quilt Well.

Rag Quilts for Life

October 30, 2015 By Quilter's Thread

Rag quilts are a great way to make a quilt out of any left over scraps of fabric you have laying around or even old flannel shirts or blue jeans that your family has grown out of but are still in good condition. What’s great about rag quilts is it allows you to hold on to these clothing items and keep the memories forever in a blanket that your family can then use as a blanket on the couch or even hang it up on the wall. So why not hold on to those memories and make a rag quilt for you next quilting project!

09edd09050fbd99d2f3a6fdc3a801396

Most rag quilts are made in square blocks of fabric. Depending on the size of the fabric that you have to make the quilt you can make you squares bigger or smaller. Making your squares of fabric bigger though will help make the process of completing the quilt go way faster since you won’t have to attach as many squares together. Or if you have longer pieces of fabric you can make long rectangle shaped blocks to make up your rag quilt as well.

photo 1

Baby Boy Rag Quilt from Quilting In The Rain.

Rag quilts are also a great way to make with any baby clothing that you have that you want to hold on to as well. Or you can even make a rag quilt for the holidays coming up such as Thanksgiving or Christmas that your family can use to keep warm during this winter.

When making the rag quilt you can choose where you want to place you blocks of squares. For instance, some people like to create different rows of blocks with different shades of color giving it a pattern of stripes or some quilters simply place the individual blocks of fabric wherever they please giving it a more rustic look that took no effort.

Your options on how to make your own unique rag quilt are endless! So pick a theme you want to do and make your rag quilt. Make sure to post your finished results of your quilt on our Quilter’s Thread Mobile App. If you haven’t downloaded the app go to our home page for more information. Keep posted and watch the gallery feed on the app to see pictures posted of rag quilts in the next week and make sure to check out our blogs in the future for tips on how to make rag quilts.

Live Well. Quilt Well.


The Log Cabin Quilt-As-You-Go Method

October 25, 2015 By Quilter's Thread

Lots of quilter’s prefer the quilt-as-you-go method because it is thought of as an easier system of quilting by simply attaching piece after piece of finished individual blocks to the next finished individual block creating the quilt as a whole piece over time. Remember the only thing that is different with this method is that the batting and backing is already put together with the blocks before attaching the blocks together.

6a00e54fb5759888340147e1eb5f7f970b-800wi

You can try the log cabin quilt for your pattern when first trying the quilt-as-you-go method. By choosing the log cabin quilt pattern for this method it allows the sashing to blend in more with the top appearing as a soft subtle frame for the blocks. The log cabin pattern is perfect for quilting as you go because it makes it easy for you to attach fabric piece by piece because of the long cut strips of fabric that you are using.

6a00e54fb5759888340148c7e551f4970c-800wi

Here are some guidelines and tips to help you as you complete this pattern while using the quilt-as-you-go method.

  1. When creating the log cabin pattern start in the middle center of the block. Once you have layered the backing and the backing together take your first square or rectangle piece of fabric and pin it in the middle of the block to use it as your focal point. Then start adding the strips of fabrics around the square in the middle working your way out using pins as you please to keep everything in place.
  2. Once you have finished the log cabin pattern for the block make sure you smooth everything out as you go so there aren’t any wrinkles once you are finished.
  3. After you have completed all the blocks and have trimmed them down to the same size you can start attaching them together.
  4. When your blocks of the log cabin are finished you can now start putting them together, sometimes referred to as “sashing”.
    1. The front piece of sashing will be 1″ wide x the height of the block. This piece of sashing is placed right sides together along the one side edge of that block.
    2. The backside piece of sashing will be 1.75″ wide x the height of the block. This backside piece is then folded in half with the wrong sides together along the length and then pressed.
    3. Make sure that on the back of the block the folded back sashing is placed with the raw edges of the sashing matching the raw edges of the block. Always make sure the raw edges meet.
    4. Sew the sashing pieces in the block using a 1/4″ seam allowance. Then add the adjoining blocks together. The front sashing piece is opened and is now facing away from the first block with the raw edge matched to the side of now the second block that you have. Sew the second block to the front sashing using again a 1/4″ seam allowance. Now you have connected to blocks together!
    5. Turn to the back of the block. Notice the sashing piece is pulled over in the middle to cover the back seaming. Now you can fold the sashing back over the seam and stitch in place by hand or by using your machine.

Make sure to share with us your favorite tips and tricks that you like to use when quilting on Quilter’s Thread Mobile App.

Live Well. Quilt Well.

« Previous Page
Next Page »

Primary Sidebar

Welcome!

Lisa Berentsen
I’m Lisa Berentsen, 
a teacher and artist who uses abstract geometric quilts to create images depicting beauty, balance, joy and hope. Share the passion and dialog. Create!

Live well, Quilt Well.

Newsletter

We'd love to keep you up to date on the latest with Quilter's Thread and share a free pattern with you. Never miss a post or a pattern, and get the best quilting content in the world delivered to your inbox each month.

Search Quilter’s Thread

Recent Posts

  • Free Falling Upward: Gravity and the Aspen Trees
  • What was wrong with Supernova?
  • “Wandering With Abandon” will be wandering for 2 years
  • Quick Quilt for Project Quilting 10.3 Challenge.
  • New Quilt: Promising First Date

Copyright Quilter's Thread© 2025