• Skip to primary navigation
  • Skip to main content
  • Skip to primary sidebar

Quilter's Thread

Quilting Inspiration and Education

  • Home
  • About Lisa
  • Gallery
  • Shop
    • Cart
    • QT Summits
    • Patterns
  • Events
    • Calendar
  • Contact

Fun Flannel Quilts for Fall Season

September 16, 2015 By Quilter's Thread

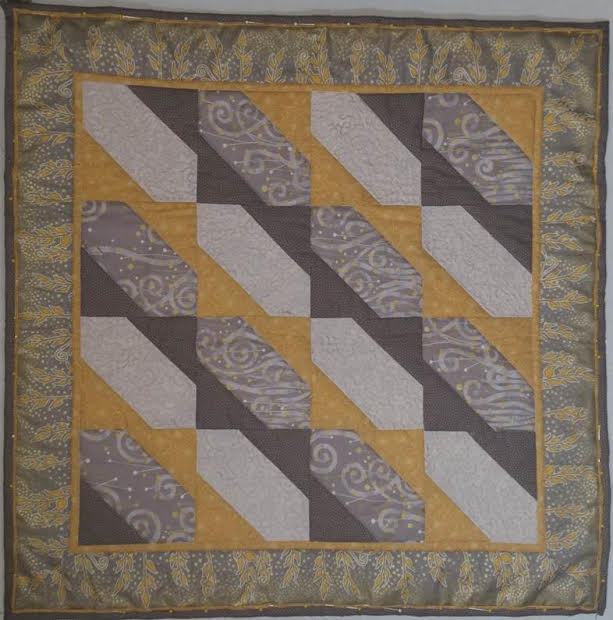
Fall is a great season for quilters because the change in season inspires us to make more quilts for friends and family. As the weather starts to fall below sixty degrees there is a need to bundle up and stay warm. There so many traditional themed quilts that are perfect for incorporating fall colors and patterns that give your quilts that extra bulk needed for the cold as well as that extra comforting feeling. So for your next quilt project try making a flannel quilt. Here are two great examples of fall flannel quilts to make this season.


Screen Shot 2015-09-09 at 9.20.31 PM

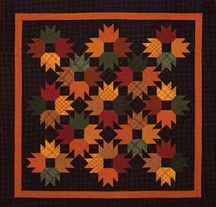
Maple Leaf Pattern Quilt

This autumn themed quilt is another great way to decorate your home this fall with its earthy tones of red, green, orange and yellow that mimic the change of seasons from summer into fall. Having the background of the quilt be a dark brown helps the colored leaves pop-out of the quilt and catch your attention first. For more information about this quilt click here.
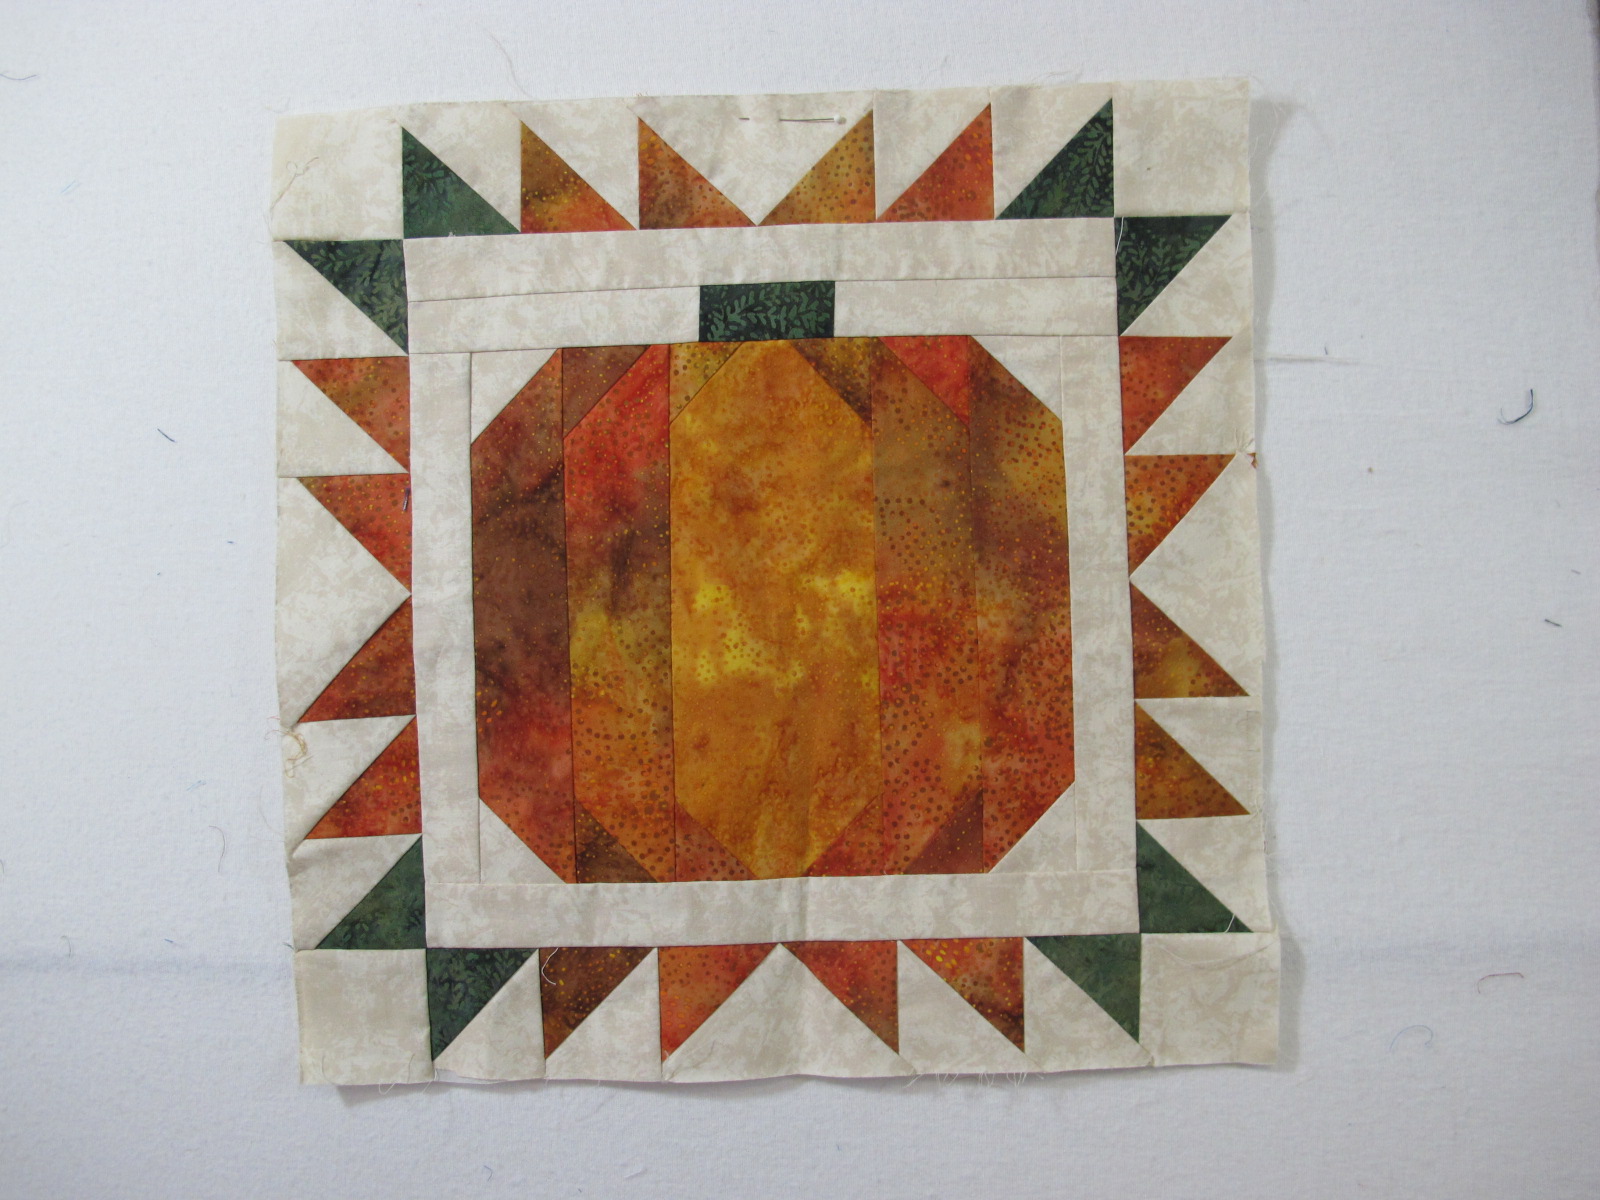


Pumpkin 2Pumpkin Rag Quilt

This pumpkin rag quilt is a great autumn themed quilt that you can also use for decoration for halloween. This quilt is made out of flannels and is quilted as you go along leaving the edges exposed and are snipped to encourage ravel (i.e. the “rag” look).  Snipping the seams for the ravel can really tire your hands after a while. Try using scissors with a more comfortable handle with a short blade to cut. By using that kind of scissors you will put less strain on your hands when cutting. The Fiskars Amplified Mixed Media Scissors can help reduce hand fatigue when cutting.


unnamed

Tips to making the perfect flannel quilts:

  1. Always prewash your flannel fabrics before turning them into quilts. This is because when washing flannel, it can shrink differently so it’s best to do so before you actually begin quilting so that you know what to expect with the size of material. Make sure to buy a little bit more than the actual size that you want your flannel fabric to be so that if it does shrink you’ll have enough to make your quilt with the exact measurements.
  2. Always add a little bit more to the seam allowance because flannel can tend to fall apart more easily than regular fabric quilts. So instead of making the seam 1/4″ try making it bigger about 3/8″ in order to make the seam more durable.
  3. Use lots of pins when sewing your flannel together in order to hold everything in place. Flannel can be difficult to keep together when making it into a quilt. Also make sure you have extra needles handy. When sewing with flannel your needles can get dull quickly because the fabric is so much thicker than others.
  4. Be gentle with your flannel when ironing it because flannel does tend to stretch out.

Although using flannel as your main fabric in a quilt can be tricky to make, it is also very rewarding and can last you a life time and you can always count your flannel quilt to keep you warm through the cold winters. Share with us on our mobile app your favorite flannel or fall themed quilt on Quilter’s Thread.

Live well. Quilt well.


Quilter’s Thread App is Available on the Web

August 25, 2015 By Quilter's Thread

QT-Splash-Normal

We are happy to announce that Quilter’s Thread mobile app is now available on the web. Now you can login to our app from your computer to see all of the daily quilting posts and interaction. You can still login in to Quilter’s Thread mobile app on the iPad and smart phone as well.

If you haven’t already heard, Quilter’s Thread also has a new point system for our app users. This point system will allow you to win monthly prizes based on your level of points per month. So sign in and start using Quilter’s Thread app with whatever electronic device is convenient for you.

Offers and Point System:

  • 10 points = Bronze level= Quilter’s Thread Monthly Pattern
  • 40 points = Silver level= Quilter’s Thread Cloth Bag
  • 75 points = Gold level= $20 Quilter’s Thread Visa Gift Card

The points that you earn will expire at the end of every month and prizes are rewarded if you reach any of the levels at any point during the month. To earn these points start being more active on the Quilter’s Thread mobile app through user interactions and by commenting more on the app. High social engagement such as comments, interactions and survey responses equal 1 point each and 1 point for 3 likes. Communication is key to life and so goes the same for quilting in order to learn new skills. The best way to learn is from others so that is why we want you to jump in and talk with us as well as others on our mobile app.

So check out Quilter’s Thread mobile app and share it with your friends. By checking in and being active on our app you will earn points to receive prizes.

Live Well. Quilt Well.

Hand-Piecing Tips and Tricks

August 14, 2015 By Quilter's Thread

Most hand piece quilting is not meant for the sewing machine, it is done by hand and can take a long time to complete. Make sure you take the time to work on it as much as possible in order to keep your project moving along so that it eventually gets done. What’s great about hand piecing is that it is an excellent way to keep practicing your sewing skills. The options are limitless for what designs, patterns and shapes you can hand piece when quilting. Here are a few tips and tricks to help you when hand piecing.

What Kind of Needle to Use 

It’s important to pick out a good needle to use when hand piecing so that you can get a good hold of the fabric while also getting a good view. You want a needle that has a very fine eye and smaller shaft than normal. A good recommended needle for hand piecing quilting is normally a needle no. 9 or 10. Always make sure to use a thread color that matches the darker fabric that you are piecing together so that you don’t see the stitches so easily when it is completed. However, simply choose what needle works best for you above all.

Threading the Needle

Sometimes threading your needle can be troublesome. What helps is to try holding the thread between your fingers and place the needle over the top instead. This is taking the needle to thread instead of taking the thread to the needle. Also try to double your thread to make it strong so that it doesn’t fall apart as you make your stitches.

Piecing the Edges

Always make sure that your pieces on the outside of the edges are cut straight on the grain. For Triangles cut where the straight grain connects a bias edge allowing less stretching of the fabric to occur while hand piecing.

Templates or Paper Piecing

Using a template or paper piecing can also help you when hand piecing in order to keep your measurements exact and precise. Templates are great for measuring and then cutting your fabric to look exactly like the shape of the template and saves you some extra time.

Other Helpful Tips: 

  • Organize your pieces before beginning.
  • If you can’t stitch in a straight line, pick an easier project.
  • You must make your cuts of pieces precisely.
  • Good hand piecing stitching means five to six stitches per inch per piece.
  • Where your stitching ended on one piece is where you will start when attaching another piece.
  • Sometimes the best way to hand piece quilt is develop your own way of doing it.

Hand Piecing Ideas

  • Hexagon Flowers

Screen Shot 2015-08-14 at 1.06.53 PM

  • Pinwheel

IMG_5550.JPG

  • Stars

IMG_9537

Share with us on our mobile app your favorite hand pieced quilt designs or any tips you find helpful when hand piecing! Make sure to increase your user interaction and comments in order to earn points and you may receive prizes every month such as a free pattern. Stay tuned next week for a blog post from Quilter’s Thread for more information about this.

Live Well. Quilt Well.


Six Easy to Make Quilts for Beginners

August 7, 2015 By Quilter's Thread

1. JoyAnn’s First Strip Quilt

Joy's 1600 quilt

Joy’s 1600 quilt

This picture right here is a quilt posted from one of our app users JoyAnn (on the right) with her Grandmother-In-Law and her quilt top pieced in less than a day! This kind of quilt is perfect for any beginner or regular quilters looking to a make beautiful quilt that is easy to do while gaining more practice. What also makes this a fun first quilt to make is all the different kinds of colors that you can incorporate into the design.  Simply get the right measurements and pick out your favorite patterns!

Here is what you need: 

1. (40) 2 1/2 ” strips of fabric

2. Backing and batting for 48″ x 64″ quilt (about 3 yards of 42″ wide fabric)

3. Binding (about 1/2 yard)

This is constructed the same as when using the pattern for JoyAnn’s 1600 quilt.  The instructions can be found in the Gallery Library.  Sew all the strips together, end to end, making one long strip.   Then fold the long strip in half right sides together (short end to short end) and stitch along the side using a 1/4″ seam. Then cut the fold as you approach the end of the seam. Continue to repeat this process four more time. Your Quilt will be approximately 48″ x 64″. Then finish it as you wish.

Larger 1600's Quilt

Larger 1600’s Quilt

This quilt with the different shades of blue with white is similar to the quilt above but is a bit larger and has white squares added into the design that are placed in between the lines.

2. Simple Rag Quilt

Biscuit Quilts - Rag Quilt Pattens

Biscuit Quilts – Rag Quilt Pattens

This kind of quilt is easy and fun to make for beginners. A simple rag quilt is often a four patch sewn with four different kinds of fabric that varies in colors and patterns. Use the numbering of the pattern to help follow the design as you make your quilt. However, there are different ways to make this kind of quilt depending on one’s own preference. Always be creative and have fun!

For more information on this quilt and instructions on how to make it click here.


3. Pinwheel Quilt

Colorful Pinwheel

Colorful Pinwheel

It is easier if you start by picking a pinwheel pattern such as this one in this image above. Having the pinwheel be bigger, take up more space, and be less complex will make it easier for you to cut, stitch and complete than if the pattern had multiple smaller pinwheels. Once you have tackled this type of quilt then try making a more complicated pinwheel quilt for practice.

4. Log Cabin Quilt

Log Cabin Block Pattern

Log Cabin Block Pattern

A log cabin quilt is also a great quilt to make as a beginner and is also a traditional quilt pattern. Notice how the pieces go in a clockwise motion and the pieces start out small in the middle then getting bigger as they move out away from the center. This is also a great way to practice piecing together blocks. It is also important to remember that there are different types of of log cabin patterns so simply pick one that seems easy to you and go for it! Here is another image of a Log Cabin quilt below.

log cabin quilter's thread

5. Quick Corner Quilting

Quick Corners Quilt

Quick Corners Quilt

This technique is the best for a beginner who wants to make a quilt that incorporates triangles in the pattern. However, triangles are normally not a first good choice as a beginner to try out because the triangle shape can be a little more tricky to accomplish than straight line quilts. First try making one of the other quilts above and then try advancing to making this kind of quilt.

Quick Corners Technique

Quick Corners Technique

You can see the technique a little better in this image with the black squares outlining the pattern in a single block design. Sometimes it is easier to see it when it is outlined this way. If you look closely the design simply switches the center in the half block and each block has two “quick corners”.

Hint: Regardless of what pattern you choose to try for the first time quilting always make sure that the pattern has clearly written instructions that you can follow. As easy as the pattern may be, if there arn’t clearly written directions you won’t get that far. Having designs that are easy to follow and read will help you when cutting fabric precisely and make it easier to match up your points of the pattern together perfectly. That is why it is important for beginners to practice making quilts that are easy to cut and stitch together first before trying techniques that are more complicated.

 6 Butterfly Quilts

butterfly 1

butterfly 2

This is a photo of a single block design quilt that uses the quick corner technique in a caddy-wampus fashion to make butterfly wings. This kind of quilt is fun to make especially in the summer or spring time.

Always remember practice makes perfect, so keep on practicing your technique. Share with us on Quilter’s Thread mobile app your first quilt you made or tell us what helped you out as a beginner!

Live Well. Quilt Well.


« Previous Page
Next Page »

Primary Sidebar

Welcome!

Lisa Berentsen
I’m Lisa Berentsen, 
a teacher and artist who uses abstract geometric quilts to create images depicting beauty, balance, joy and hope. Share the passion and dialog. Create!

Live well, Quilt Well.

Newsletter

We'd love to keep you up to date on the latest with Quilter's Thread and share a free pattern with you. Never miss a post or a pattern, and get the best quilting content in the world delivered to your inbox each month.

Search Quilter’s Thread

Recent Posts

  • Free Falling Upward: Gravity and the Aspen Trees
  • What was wrong with Supernova?
  • “Wandering With Abandon” will be wandering for 2 years
  • Quick Quilt for Project Quilting 10.3 Challenge.
  • New Quilt: Promising First Date

Copyright Quilter's Thread© 2025